Saturday 22 October 2011

After the Battle

A few random shots of the battlefield just before the troops were put back in their boxes...


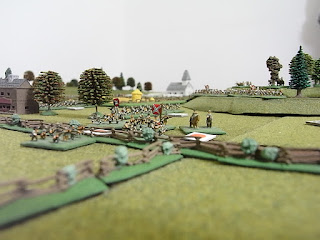
Crenshaw’s rifled battery of A P Hill’s Division – fire from this battery stopped Kearny’s routed troops from rallying in the town.


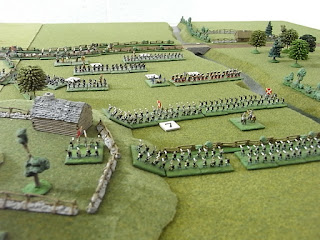
A view of Kearny’s collapsing flank from behind the advancing Confederate line – that’s Joe Hooker looking a little exposed in the middle of that field!
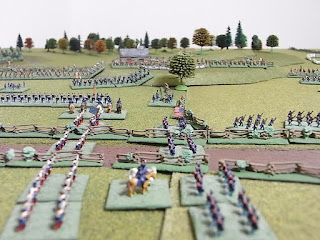

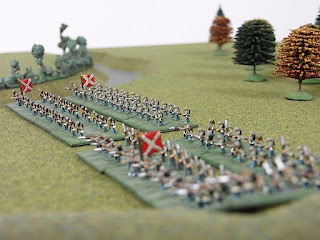
The view forward from the Union left flank – A P Hill’s men are visible in the distance.


Another view of the Rebel attack on Kearny – looking due north from the Wheatfield towards Avery’s Ridge.


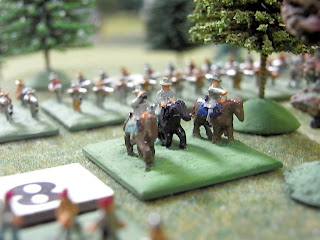
Fitzhugh Lee’s troopers on Pitt’s hill didn’t fire a shot all day but added a bit of dash to proceedings.


More of Kearny’s Division in front of Elington – the general can be seen trying (unsuccessfully) to rally his broken command.


A ground-level view looking west towards Elington – Rebel infantry are advancing through the Wheatfield in pursuit of the Yanks…
Thursday 20 October 2011

Second Half

1.00 pm to 3.00 pm


Ewell’s Division assaults Elington from the south. His Brigades press forward towards the town and the flank of Kearny’s line near the Wheatfield.


The view of Ewell’s assault from the southwest of Elington. Randolph’s unsupported battery was routed as the sea of grey & butternut troops drew closer.


Under the watchful eye of General Jackson the ‘Stonewall’ Division move down the western edge of Round Top to support Ewell.


It was touch and go for Ewell as Sykes Division arrived to temporarily stabilize the Union right. They succeeded in routing one Rebel Brigade and causing Ewell to quit the field with a grievous wound!


To the north of the town the Divisions of Steven’s, Hooker and Reno come under increasing pressure from A P Hill.


The same scene from the Confederate perspective.

More of A P Hill’s Brigades move along the crest of Avery’s Ridge. Possession of this feature was to prove crucial in the eventual Rebel victory.


Confusion reins in the centre of Elington as one after the other Kearny’s Brigades collapse and rout under the weight of Ewell’s flank attack.

Saturday 8 October 2011

Half Time

The situation at 12.30 pm.


General Pope arrives on the field and takes over command from Heintzelman (Pope is a "C" rated commander which doesn't bode well for the Union).


Signs of confusion in the Union ranks - Reno's Division of IX Corps attempt to deploy on the left flank but keep failing the die roll to receive their orders and just keep on marching!


Meanwhile A P Hill's men can be seen forming up into battle-line between Cartharpen Run and Avery's Ridge - all of Hill's Brigades are "9" strength which is not so good for the Yanks.


In the centre Union sharpshooters move forward through The Wheatfield supported by Kearney's line. So far neither commander has issued any "Engage" orders so the main battle-lines remain silent.


The Confederate side of The Wheatfield.


Over on the south side of the table Pelham's Horse Artillery are in position on Pitt's Hill - these Rebel troopers have a good view of proceedings but their artillery is out of range of the enemy.


Ewell's men move forward to menace the Union right flank which looks a bit "up in the air" at the moment.


A close up of Ewell's boys (painting those Rebel flags must have been almost as much hard work as painting the Stars & Stripes!).


Randolph's Rifled Battery prepares to fend off Ewell's Division all on its own on the extreme right flank of the Union army.


General Jackson surveys the battle from his position on Round Top.

Kearny's Division - planted firmly in front of Elington and unable advance without further orders. Now General Pope is on the scene perhaps things are about to change?

Thursday 6 October 2011

The Battle of Elington – Part 1

Turns 1 to 8 - 9.00 am to 12.30 pm


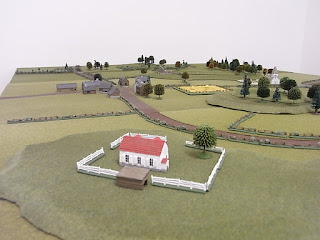
Just another peaceful day at the picturesque town of Elington, Virginia – or is it?


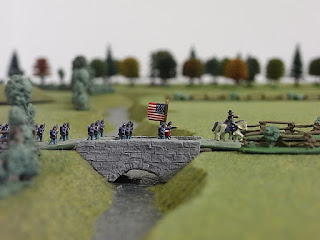
Kearny “The Magnificent” leads his Division over the Stone Bridge at the start of the battle.


The Rebs occupy Round Top (where are the 20th Maine when you need em’?)


A P Hills’ Division make a cunning move behind Avery’s Ridge – are they planning on crossing Cartharpen Run?


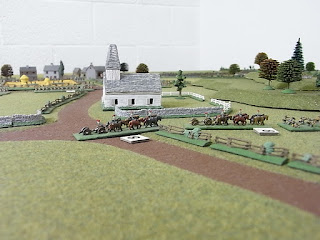
A P Hill’s artillery passes the Dunker Church in the rear of the Divisional column.


Ewell’s Divisions begin to deploy near Pitt’s Hill under long-range fire from Randolph’s Rifled Battery at Elington – time about 11.30 am.


A lone Rebel scout surveys the battle scene from the Wooding Farm.

Tuesday 27 September 2011

General Notes & Victory Conditions

Carparthen Run is classified as a Creek for movement purposes.

Ammunition rules are not being played in this scenario.

The first game move is 9.00 am and each turn represent half an hour. Dusk is 8.30 pm.

The game ends immediately if one side reaches its Demoralisation Level. If neither side reaches its DEM Level by dusk the game ends in a draw.

Confederate Demoralisation Level: 5
Union Demoralisation Level: 4

The Army Demoralisation (DEM) level is the number of simultaneously broken infantry Brigades that will cause the Army to retire from the battle in defeat.

Union Deployment

III Corps start the game deployed on The Haymarket Road with the head of their column at The Stone Bridge (order of march as per the OOB). Order mode MARCH.

General Heintzelman’s HQ is marching between the Division’s of Kearney and Hooker. Heintzelman is in command of all Union forces until the arrival of General Pope.

IX Corps follows III Corps (order of march as per the OOB). Order mode MARCH.

Buford’s cavalry followed by General Pope’s HQ arrive in road column behind Elington on The Warrenton Turnpike at 12.30pm.

V Corps follows Pope’s HQ (order of march as per the OOB). Order mode MARCH.

Confederate Deployment

Fitzhugh Lee’s cavalry start the game deployed anywhere east of The Wheatfield and south of Avery’s Ridge. Order mode RECON.

The Stonewall Division start the game deployed anywhere east of The Dunker Church and south of Avery’s Ridge. Order mode to be decided by the Confederate player.

General Jackson’s HQ starts the game deployed 6” behind The Stonewall Division.

A P Hill’s Division arrive in road column on the Warrenton Turnpike at 9.30am (order of march as per the OOB). Order mode MARCH.

Ewell’s Division arrive in road column on The Haymarket Road (heading towards Baldwin) at 10.00am (order of march as per the OOB). Order mode MARCH.

Monday 26 September 2011

Reconnaissance #1


Union troops moving south on the Haymarket Road (towards Elington).

Suggested Rule Amendments to 5th Edition

Rule 3 – Command Control
Amended Rule
3b) Offensive orders may only be issued on the basis of reports received, or if the Army Commander can see the situation. Such orders can only be issued subject to rolling the required die roll given in rule 3e.

Rule 5 – Firing
New Rule
5e) Artillery have an arc of fire of up to 45 degrees from the corners of the unit base.
5f) An artillery battery that changes facing may fire that same turn but at reduced effect – use the R/S line on the firing table (a reduced strength battery may not change facing and fire in the same turn).

Tactical Order Modes

The Brigades of a division may only operate within the limits of that division’s current order mode as specified by the C-in-C.

MARCH: Move in column of march to specified destination and deploy into specified formation (battleline or reserve). May not enter hostile zone.

HOLD: Hold present position – troops deploying from march mode automatically enter this mode. Artillery may bombard, skirmishers may deploy.

ENGAGE: Advance and engage enemy in fire-fight only. May not assault or retire.

ASSAULT: Advance and assault the enemy without delay. Must continue to assault with all available forces until enemy is broken or retire orders are received.

RETIRE: Retire to specified position. Automatically enter hold mode when movement is complete.

RECON: Initiative mode for cavalry only – cavalry commander has complete tactical freedom within framework of his current orders.

Friday 23 September 2011

Order of Battle - General Pope's Forces

Order of Battle – General Pope’s Forces
28th August 1862

Headquarters:
General John Pope – “C” Rated Commander

Corps Cavalry:
Buford 8 SP’s

III Corps Army of The Potomac:
General Samuel P Heintzelman Commanding – “B” Rated Commander

Kearny’s Division:
General Phil Kearny “The Magnificent” Commanding – “A” Rated Commander
Robinson’s Brigade - 7 SP’s
Birney’s Brigade - 9 SP’s
Poe’s Brigade - 8 SP’s
Randolph’s Rifled Battery

Hooker’s Division:
General “Fightin’ Joe” Hooker Commanding – “B” Rated Commander
Grover’s Brigade - 8 SP’s
Taylor’s Brigade - 8 SP’s
Carr’s Brigade - 9 SP’s
McGilvery’s Battery

IX Corps Army of The Potomac:
General Jesse L Reno Commanding – “A” Rated Commander

Steven’s Division:
General Isaac Stevens Commanding – “B” Rated Commander
Christ’s Brigade - 8 SP’s
Leasure’s Brigade - 6 SP’s
Farnsworth’s Brigade - 7 SP’s
Cook’s Battery

Reno’s Division:
Brigadier-General Henry Naglee Commanding – “C” Rated Commander
Naglee’s Brigade - 9 SP’s
Ferrero’s Brigade - 9 SP’s

V Corps Army of The Potomac:
General Fitz John Porter Commanding – “C” Rated Commander

Sykes’s Divisions:
General “Tardy George” Sykes Commanding – “C” Rated Commander
Buchannan’s Brigade - 8 SP’s
Chapman’s Brigade - 7 SP’s
Warren’s Brigade - 7 SP’s
Weed’s Battery
Randol’s Rifled Battery

Monday 19 September 2011

Battlefield Sketch Map

Order of Battle - Jackson's Corps

Order of Battle – General Jackson’s Corps
28th August 1862

Headquarters:
General Thomas Jackson – “A” Rated Commander

Corps Cavalry:
Fitzhugh Lee - 8 SP’s
Pelham’s Horse Artillery

Stonewall Division:
General W Taliaferro Commanding – “B” Rated Commander
Baylor’s Brigade - 6 SP’s
Seddon’s Brigade - 7 SP’s
A Taliaferro’s Brigade - 7 SP’s
Starke’s Brigade - 8 SP’s
Carpenter’s Battery

A P Hill’s Division:
General Ambrose Power Hill Commanding – “A” Rated Commander
Branch’s Brigade - 9 SP’s
Pender’s Brigade - 9 SP’s
Thomas’ Brigade - 9 SP’s
Gregg’s Brigade - 9 SP’s
Archer’s Brigade - 9 SP’s
Field’s Brigade - 9 SP’s
Carter’s Battery
Crenshaw’s Rifled Battery

“Popeye” Ewell’s Division:
General Richard S Ewell Commanding – “A” Rated Commander
Lawton’s Brigade - 8 SP’s
Trimble’s Brigade - 6 SP’s
Early’s Brigade - 9 SP’s
Hay’s Brigade - 8 SP’s
Garber’s Battery

Sunday 18 September 2011

The Battlefield

Union photographer Mathew Brady took these pictures of the Battlefield in March 1864. Apparently little had changed in the landscape since August 1862 except that most of the snake fences had been repaired (click on any image to enlarge it).


Looking west along the Warrenton Turnpike towards the Dunker Church. The town of Elington can be seen in the distance.


About a mile due south of the Dunker Church is the small town of Baldwin. On the horizon is Round Top.


Looking west across the famous Wheatfield towards Elington


The Stone Bridge that carries the Haymarket Road across Cartharpen Run (the entry point of the Union forces).

Report From Fitzhugh Lee

From: Brigadier-General Fitzhugh Lee
08.15am 28th August 1862 – At the Dunker Church on the Warrenton Turnpike

To: Major-General Thomas Jackson

General, My Brigade has been on the road since dawn and I have been receiving reports that Yankee forces are approaching Elington two miles west of my current position. I believe that at least part of Heintzelman’s III Corps Army of the Potomac is approaching the town from the north on the Haymarket Road. By the manner of their marching, lacking any cavalry or skirmish screening, the enemy appear to be unaware of the presence of our forces. Perhaps we have a chance to take them by surprise! I am keeping my men out of sight and have scouts placed to report back on further developments.

I am sir your humble and obedient servant,

Fitzhugh Lee

Orders From General Lee

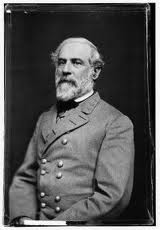
Robert E Lee
Headquarters Army of Northern Virginia
25th August 1862 – Near Brandy Station, Virginia

To: Major- General Thomas Jackson

General, I believe that we must take bold action if we are to suppress that miscreant Pope before McClellan’s army reinforces him. To achieve this we must draw his forces away from Washington and I plan to do so by sending your Corps on a flanking march to the west via Thoroughfare Gap while Longstreet holds the Rappahannock Line. If you can you should cause panic and confusion in Pope’s rear and threaten his supply depot at Manassas Junction. This will enable the main body of our army to slip away from the Rappahannock and join with you in favourable circumstances and on ground of our own choosing.

If you get the chance to isolate and beat a smaller part of the enemy army you should do so but do not risk your Corps unnecessarily. I have every confidence in your abilities to carry out my orders and am sure that you will do all that the South and Virginia could ask of you over the coming days.

General Robert E Lee