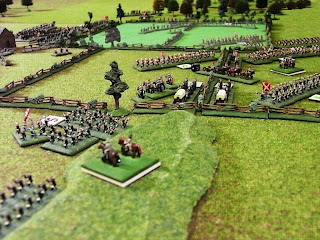
Cutler's Farm - viewed from behind the Union lines. Starke's division is engaging Doubleday to the right of the farm house.
Sigel's corps deploying behind Porter's line.
On the extreme left of the Union line Bayard’s cavalry helped to stall the Rebel advance by pouring a steady stream of carbine fire into their flank but just east of Cutler’s Farm the story was different. Here the Confederates were determined to get to grips with the bayonet and despite having very low SP levels by now they had succeeded in breaking two of my brigades and a battery.
Heintzelman's men are starting to arrive on the Union left opposite Jackson.
On the far right Fitzhugh Lee and Tompkins have been sparring with each other all morning.
Meanwhile Longstreet’s flanking action continued to make steady progress near the Barnes Farm and Porter’s right was beginning to crumble. By now though, Sigel’s corps was almost fully deployed behind Porter and at the end of the turn he finally received an order from Pope (delayed one turn due to the usual dodgy Union commanders) to advance and assault the enemy.
Ewell's division arrives to support Hood near the Barnes Farm.
High-water mark for the Rebs - Hood is pushing Butterfield back, but this is as far as the Confederates are going to get.
We start each game turn with a phase of morale recovery and any units that are no longer in an enemy zone of control can recover morale by one step. This phase of the 11.30 turn proved vital for the Union as I was able to rally virtually all of my broken units. On the other hand, Dave’s assaulting brigades were running out of steam with many reduced to just 1 or 2 SP’s – units down to zero SP’s are classified as reduced strength and further hits may see them permanently removed from play.
View of the Confederate left - the Rebs are pushing hard towards the Barnes Farm.
Left-centre (view from the Confederate lines). The Union centre is now un-opposed as Dave has had to disengage Wilcox and pull him back.
Sigel’s corps now started to advance towards Hood’s stalled assaulting division at the Barnes Farm – 6 fresh brigades deployed in column of attack, a stirring sight! On their flank two of Porter’s brigades had rallied and were lending support, the Union army was looking unstoppable.
The bands strike up "Battle Hymn of the Republic", the flags unfurl and the Union troops surge forward!
Sigel's men, supported by Butterfield on their left and right - looking unstoppable.
In the centre Dave had decided to disengage and withdraw Wilcox’s shattered division whilst similarly on our left Jackson was pulling back into a defensive posture. Marching hard up the road from Sharpeville, Heintzelman’s corps had finally arrived at Cutler’s Farm to seal a Union victory. Although technically the Rebel army was not quite at break-point Dave could see the writing on the wall - the Confederate army was beaten and he conceded defeat. The victory at Cutler’s Farm gave me another 5VP’s bringing my total to 10VP’s – enough to win the campaign.
Heintzelman's corps pass through Sharpeville to join the action at Cutler's Farm but the Rebels have already started to disengage.
Jackson's men - now in defensive posture north of Cutler's Farm.
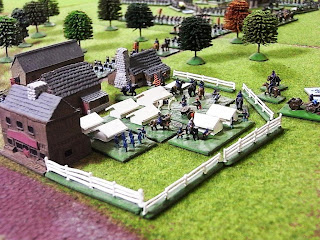
Pope's HQ - there will be celebrations going on late into the night...
It was a great campaign that gave us two excellent scenarios for table-top battles which was exactly what we had hoped it would do. Dave’s clever idea to use the Word file map for hidden movement worked really well and gave us both some nail-biting moments when we lost contact with each other. We’ve taken on board some lessons in terms of rule changes for the next one, mostly we need to do more to balance the chances of a smaller Confederate army winning against a larger Union one.
The campaign is over but the war goes on…
For the full story of the campaign don’t forget to check out our individual campaign diary blogs Wilderness Tavern and Road to Appomattox.


